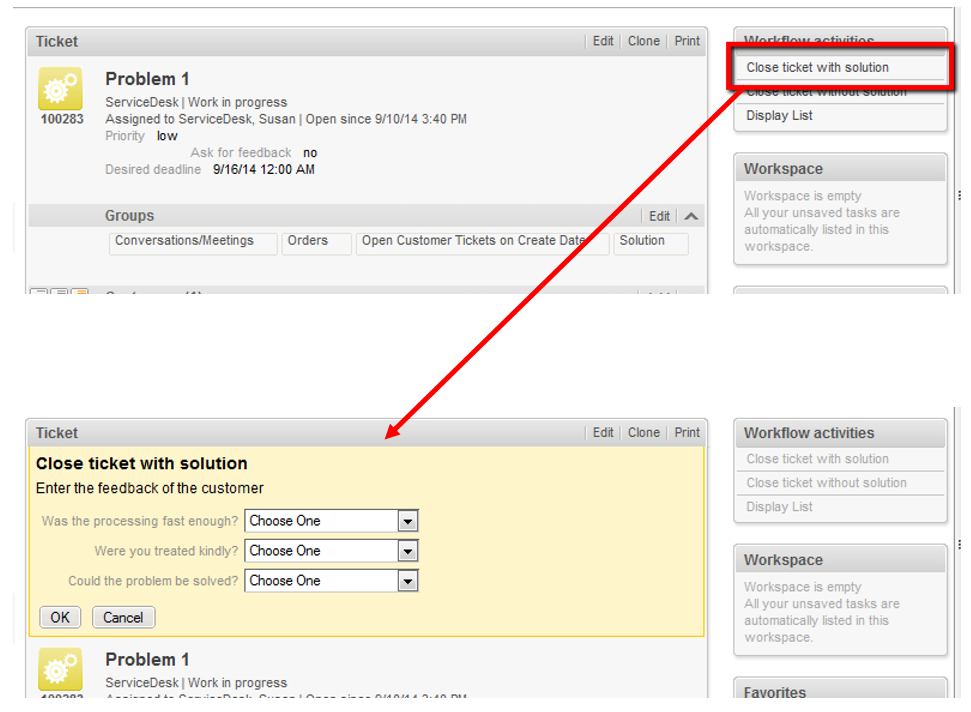
An Activity Control Form is a web form which is displayed during the process, i.e., when the engineer works on the ticket. If the engineer clicks a workflow activity, the ACF is displayed first. The engineer has to fill out certain data fields and save the changes in order to proceed and execute the workflow activity.
Figure 9: Example ACF
The Custom Fields which are used in an ACF have to be defined first, as regular Custom Fields in the ConSol CM Admin Tool. ACFs can include Custom Fields from one or more Custom Field Groups. The ACFs is integrated into the process (workflow) using the ConSol CM Process Designer. There, you can also define which Custom Fields should be required and which fields are optional. The display of an ACF can depend on a condition, e.g., the ACF Reasons for dismissal of request is only displayed if the customer has Gold or Platinum status. ACF dependencies are configured using scripts. This is explained in detail in the ConSol CM Process Designer Manual.
In this tab, you can create activity control forms (ACF) which can be assigned to activities in the Process Designer. They are used to gather input in the Web Client if a manual workflow activity needs more information for the next step, e.g., if a ticket has to be qualified before it can be moved on or if you want feedback for a ticket. ACFs are basically a set of Custom Fields already created in the tab Ticket data. An ACF can contain Custom Fields of more than one Custom Field Group. However, all Custom Field Groups have to be assigned to the queue to which the workflow using the ACF is assigned. Please read the chapter on ACFs in the ConSol CM Process Designer Manual for detailed information about the process flow with ACFs and the features provided using programming ACF scripts.
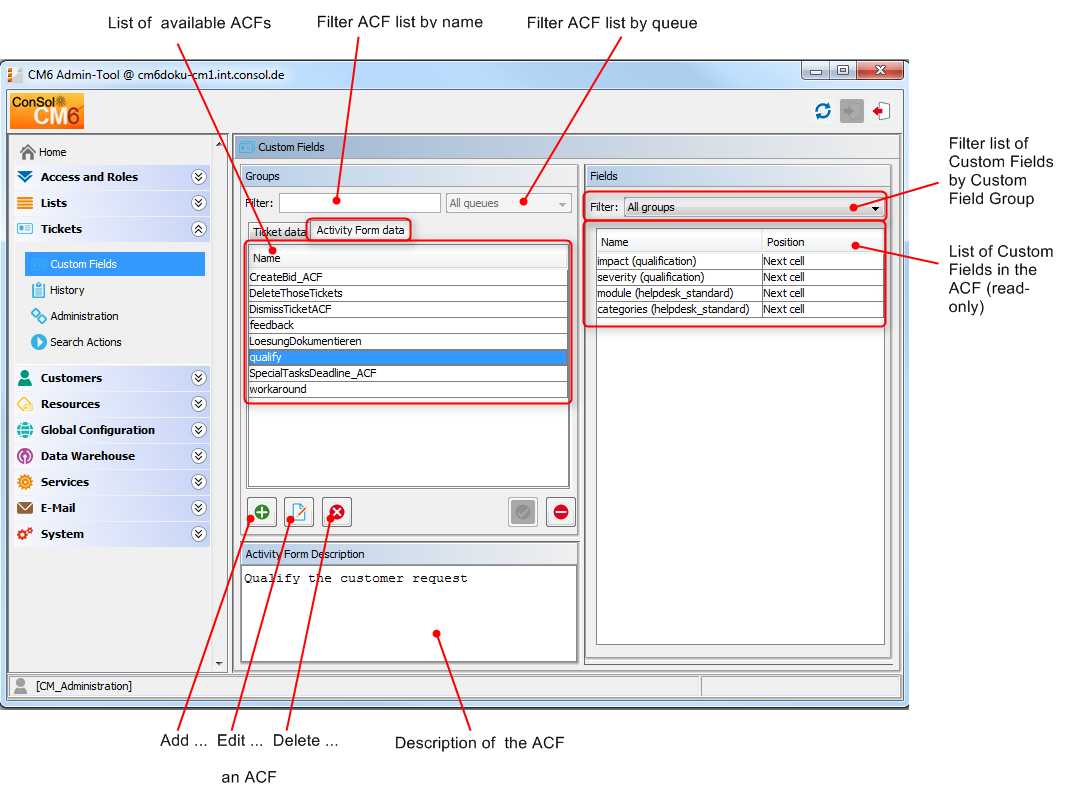
Figure 10: ConSol CM Admin Tool - Custom Field administration: Activity Form data
To create an ACF just click the Add button below the list on the left side of the page. The following pop-up window appears (this is the same window for creating and for editing an ACF).
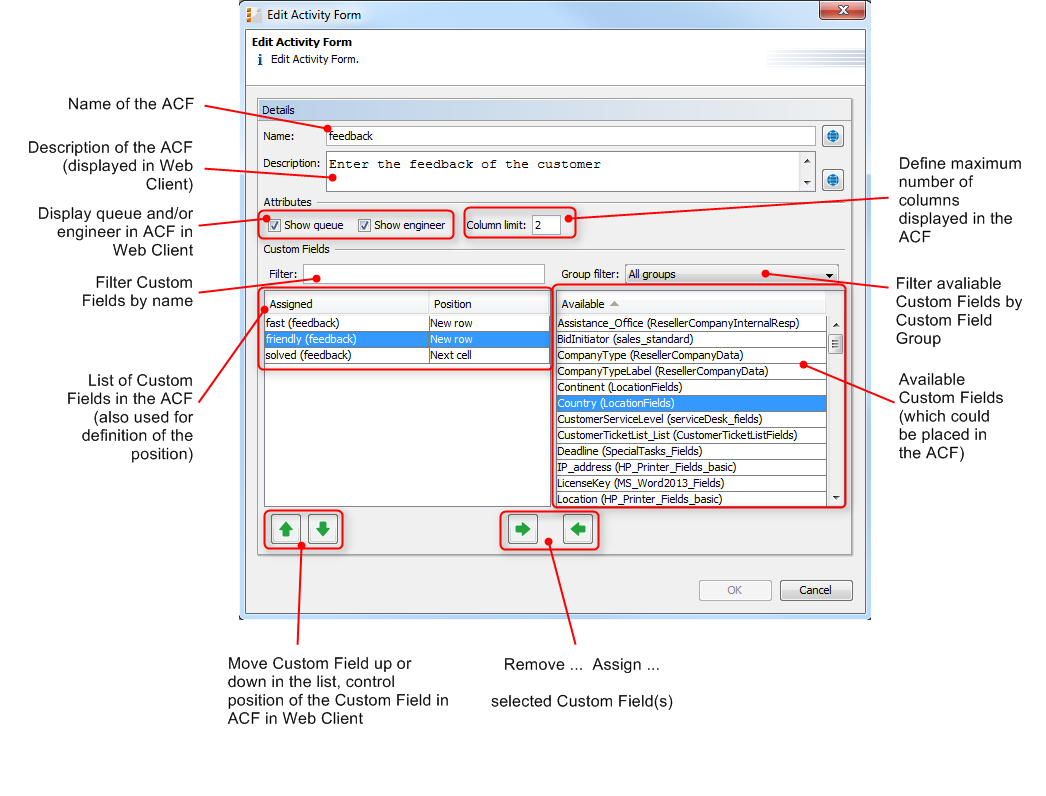
Figure 11: ConSol CM Admin Tool - Custom Field administration: Create an Activity Control Form
Please enter or select the following data:
The assigned Custom Fields will appear in the Web Client as they are ordered in the list. You can rearrange the list by selecting an item and clicking the Move upwards or Move downwards button. To remove assigned Custom Fields, select them and click the Unassign button.
Click OK afterwards to store your entries and to close the window.
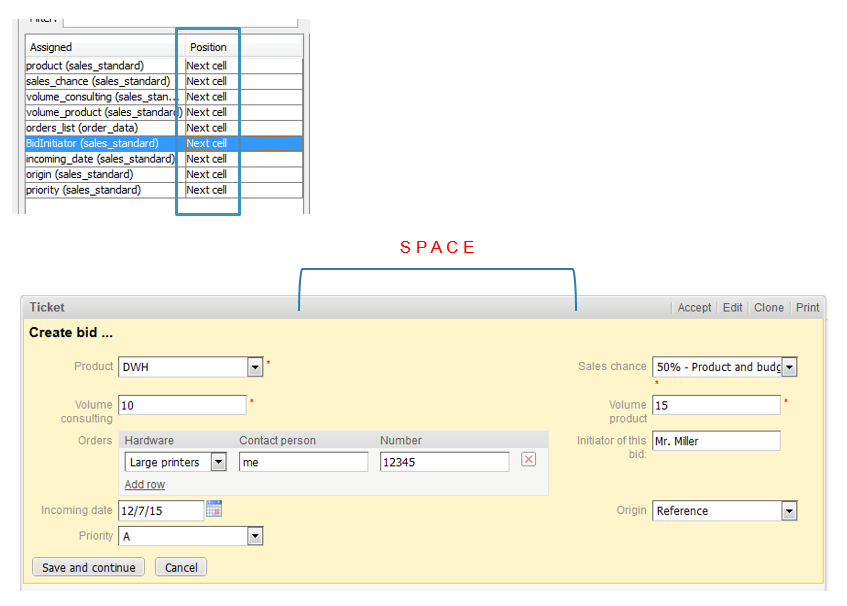
Figure 12: Example for optimization of ACF layout, 1
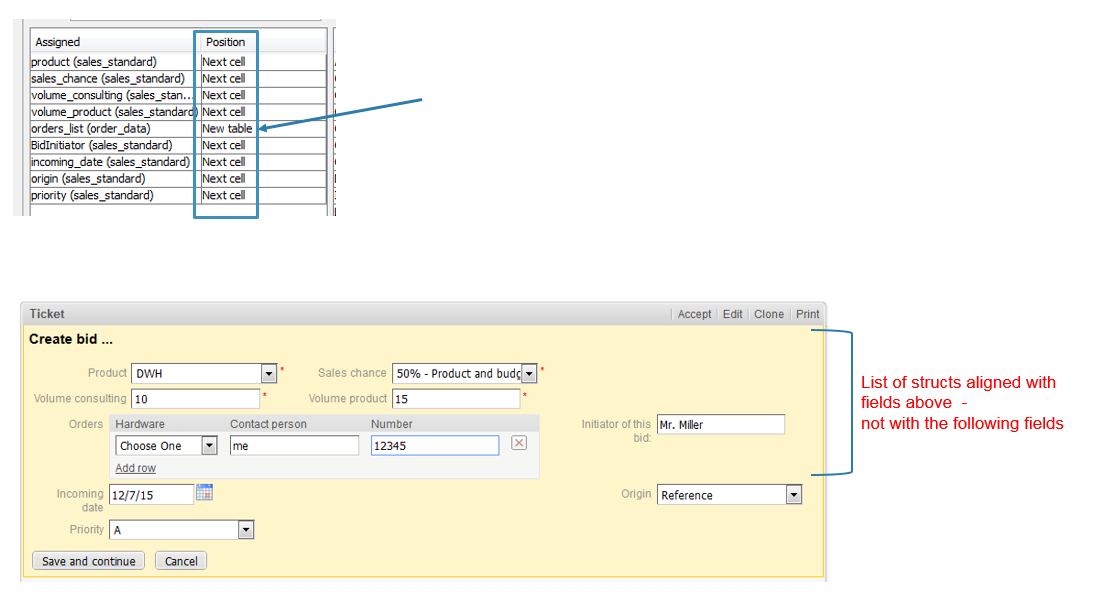
Figure 13: Example for optimization of ACF layout, 2
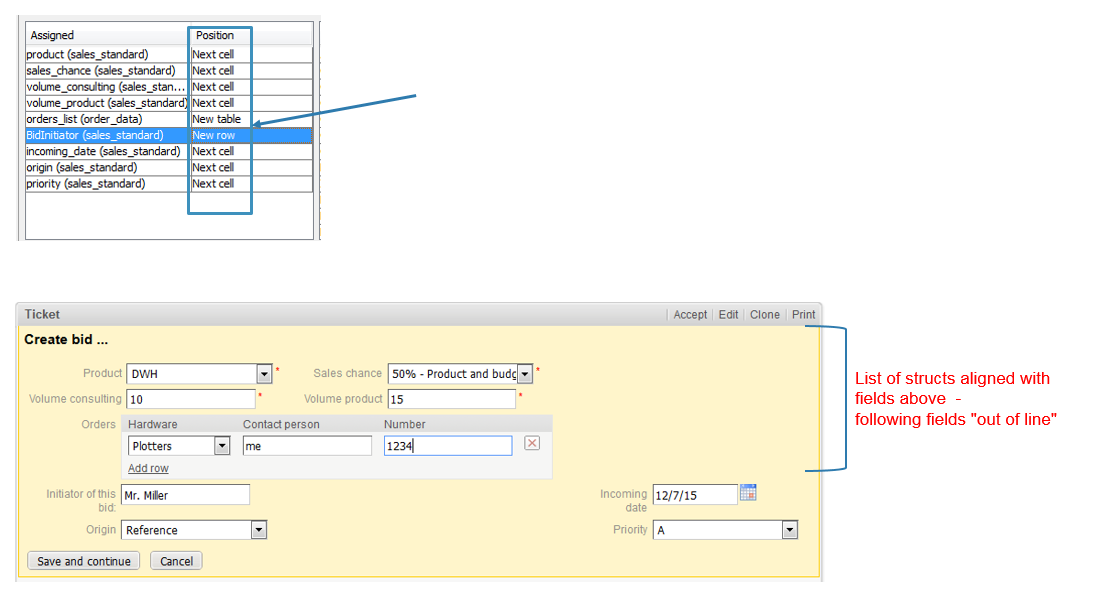
Figure 14: Example for optimization of ACF layout, 3
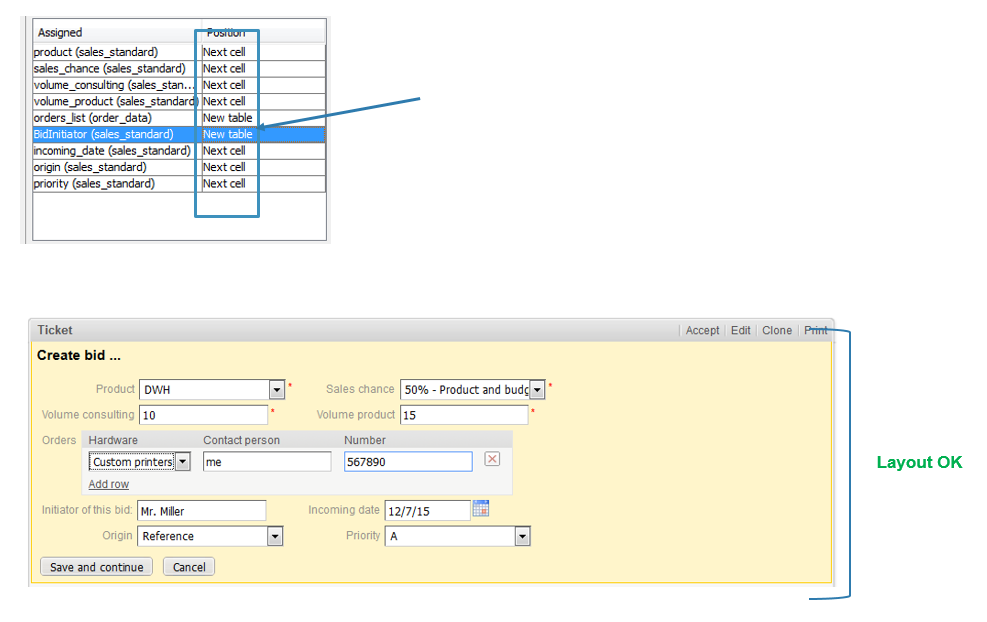
Figure 15: Example for optimization of ACF layout, 4
If you want to edit an ACF, select it in the list and click the Edit button or just double-click the name of the ACF. The same pop-up window as for creating an ACF will appear, where you can modify the details. Store your changes by clicking OK.
An ACF can only be deleted if it is not assigned to a workflow activity, otherwise you get a warning stating that you can only disable this ACF (see below). In order to delete an ACF, select it in the list and click the Delete button. If you confirm the following dialog with Yes, the ACF will be removed from the list and the system.
If you cannot delete an ACF, or if you do not want to delete it because you might need it again, you can disable it. To do so select the ACF and click the Deactivate button. The entry in the list is shown in italics afterwards. A disabled ACF is not available in the Process Designer. ACFs which are in use cannot be disabled. Just click the Activate button below the ACF list if you want to enable the form again.
By clicking the Localize button in the create or edit window you can localize name and description of an ACF. The pop-up window Localize shows the available locales on the left side. Enter the corresponding name or description in the Value field for each additional language on the right. After clicking Save the name or description will be displayed in the respective language of the engineer's locale.