This chapter discusses the following:
ConSol CM provides comprehensive CRM (Customer Relationship Management) functionalities which allow you to create links between your customers. These links are called relations and they can be established between customers of the same customer group and between customers of different customer groups. This way you can structure your customer base in ConSol CM to better reflect your real customers.
Examples for customer-customer relations (for greater readability called customer relations in this section) are:
The relations provide additional information about the customer and enable you to quickly access the pages of the related customers. You can create relations based on the relation models which are configured in your CM system. The following is defined for each relation model:
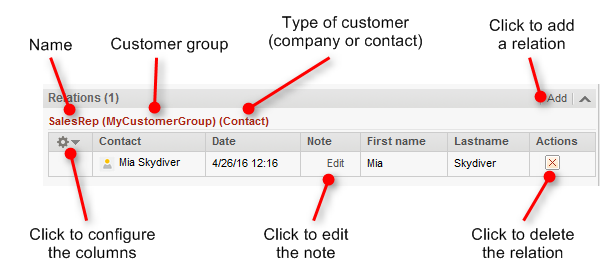
The customer relations are displayed in the Section for Related Customers of the customer page. There is a table for each relation model. The heading states the name of the relation model, the target customer group, and the type of customer (either company, or contact, or any). If no name has been configured for the relation, Related is displayed instead of the relation name. The table contains the relations which were created for this relation model.
Figure 97: Display of available customer relations
If the type of customer is any, i.e., either a company or a contact, there are two tabs: one for relations to contacts and one for relations to companies.
Figure 98: Tabs for customer relations
The relations are displayed on the customer pages of both affected customers. Depending on the relation type, the name may be different on each side:
Open the context menu next to the wheel icon to configure the table columns. The default columns (Contact/Company, Date, Note, Actions) cannot be removed, but you can add additional columns by entering the column name and selecting one of the suggestions from the Autocomplete Search. You can remove additional columns by clicking the cross next to their name.
Please proceed as follows to add a new customer relation.
Figure 99: Adding a customer relation
The following figures show the resulting relation:
Figure 100: Customer relation added
Click Edit in the Note column of the relation to add or edit its note. The note is optional.
You can switch to the customer page of the related customer by clicking his name in the column named Contact or Company. If you click another column, a preview window is opened where you can choose to open the customer page.
Click the red cross in the Actions column to delete the relation. The relation is now displayed in italics. At this point you can still undo the removal by clicking Undo remove. As soon as you execute any other action, the relation is removed for good. Note that the relation is also removed from the page of the related customer.