With ConSol CM you can book working time to projects. Please see the Time Booking Using ConSol CM section for a detailed explanation.
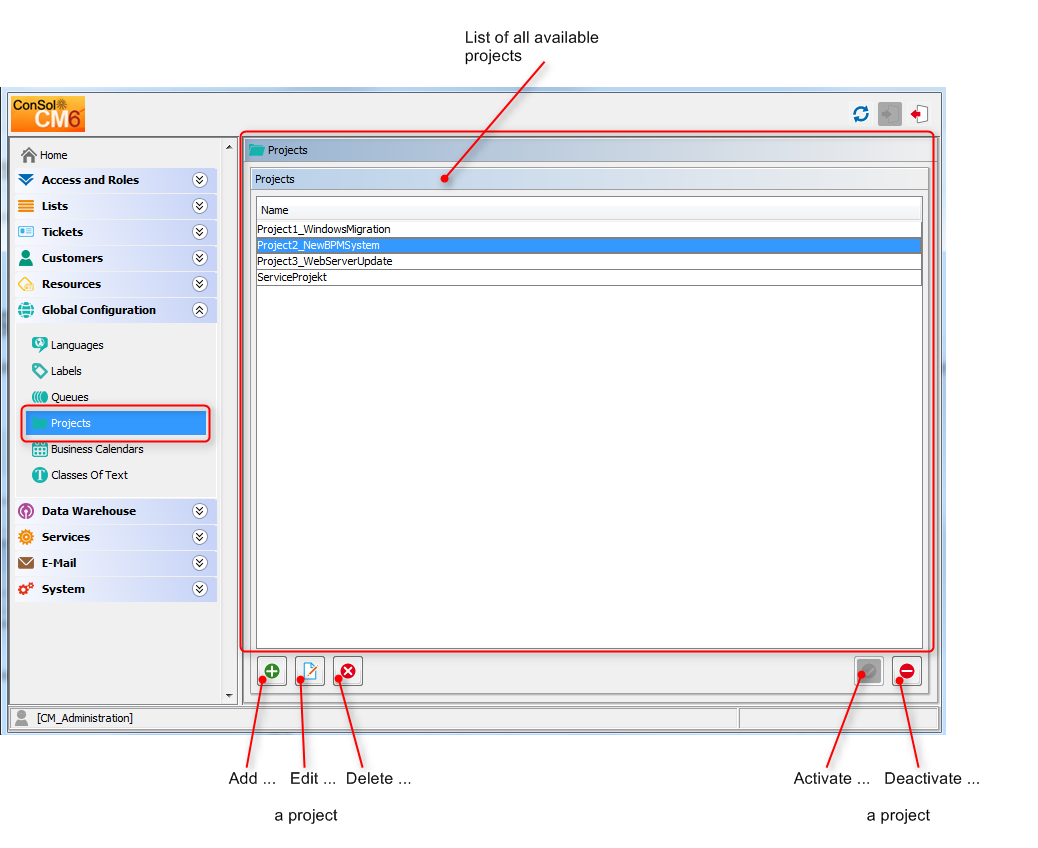
Projects are managed via the navigation item Projects in the navigation group Global Configuration. For a project to be active and available in the Web Client, it has to be assigned to a queue (see section Queue Administration). In the Web Client you can then book working time to tickets that are in one of the queues where the project has been assigned. Engineers can see their time bookings on the engineer profile page.
Figure 231: ConSol CM Admin Tool - Global configuration: Projects
A project is defined by its name. Click the Add button to open a pop-up window where you can enter the name. Using the Localize button next to the name field you can localize the name (see Localize a Project). The checkbox Enabled is pre-selected to activate the project in the system (see alsoDisable or Enable a Project). You will get the same window when you click the Edit button to edit a project.
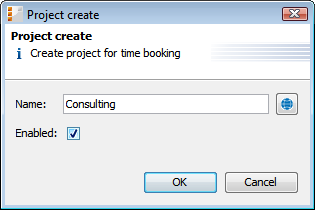
Figure 232: ConSol CM Admin Tool - Global configuration: Create or edit a project
A project can only be deleted if it is not assigned to any queues and has not been used for any time bookings. Otherwise you get a warning and can only disable this project (see below).
In order to delete a project, select it in the list and click the Delete button. After choosing Yes in the confirmation dialog the project will be removed from the list and the system.
If a project is still assigned to a queue or has been used for a time booking in a ticket, but is not needed anymore, you can disable it. To do this select the project and click the Deactivate button. The entry in the list is shown in italics afterwards. The project is not available for new time bookings anymore. Just click the Activate button at the bottom of the page if you want to enable the project again.
You can also enable or disable a project in the window used for editing projects by selecting or de-selecting the checkbox Enabled. When you create a project this checkbox is automatically selected.
Click the Localize button in the create or edit window to enter a localized name for a project. In the pop-up window Localize, all languages that are available in the system are listed. Enter the project name in the Value field for each additional language on the right and click Save. The localized project name, using the locale of the web browser, will be displayed in the Web Client in the time booking section of a ticket. If no localized value is found, the value from the default language is used. If that has not been defined either, the technical name of the project is displayed.