When you, as an administrator, have defined the Resource Data Model (Resource Groups and the required Resource Types with their Resource Field Groups and Resource Fields) using the Admin Tool, engineers can start working with real-world Resource Pool objects, provided they have the required access permissions. Permissions are discussed in section CM.Resource Pool - Assigning Permissions for Resources. In this section, you will get an overview of the following operations:
In the Admin Tool, you only define the data models for the objects (developers: this is comparable to defining classes in object-oriented programming). The real objects (the instances of the defined data models) have to be defined using the Web Client where the Resource Pool Dashboard provides the required graphical user interface. The permissions to resources are managed based on Resource Types, using roles, according to the ConSol CM standard. An engineer only sees the Resource Types in the Resource Pool Dashboard if he has the required permissions. The role management for resources is explained in detail in section CM.Resource Pool - Assigning Permissions for Resources.
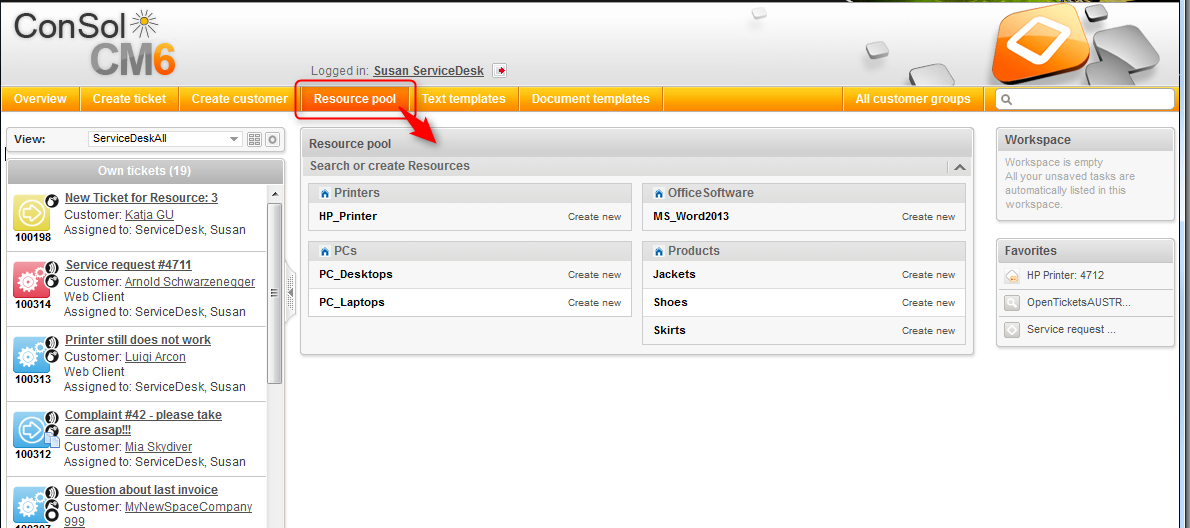
The following figure shows the Resource Pool Dashboard with the resource models which have been defined in the Admin Tool (see section CM.Resource Pool - Admin Tool Elements). The logged-in engineer has access permissions for all Resource Types.
The label for the Resource Pool in the main menu (as shown in the following figure) can be modified according to the requirements in the specific system. Examples for alternative wording could be Asset management, Products, Machines, or Inventory. Please refer to the Labels section for an explanation of how to change the label.
Figure 430: ConSol CM Web Client - Resource Pool Dashboard
Once the data models have been defined (in the Admin Tool) and you, as an engineer, have the required access permissions, you can create a real object, e.g., you can create an object for the printer #4711 which is located on the top floor.
The following figures demonstrate the required steps.

Figure 431: ConSol CM Web Client - Resource Pool Dashboard: Create a new resource of type HP_Printer, step 1

Figure 432: ConSol CM Web Client - Create a new resource of type HP_Printer, step 2

Figure 433: ConSol CM Web Client - Resource page: Create a new resource of type HP_Printer, step 3
Now you have created a new HP_Printer object, i.e., you have registered the printer #4711 (located on the top floor). The resource page of this specific printer is displayed (see figure above).
For a detailed introduction to the work with CM.Resource Pool using the Web Client, please refer to the ConSol CM User Manual. Here we will only provide short explanations to show you, as an administrator, what happens when you work with the Admin Tool configuration for the ConSol CM Resources.
The Resource Type page provides an overview of all resources of one specific Resource Type. You can open the Resource Type page by opening the Resource Pool Dashboard and clicking on the name of the Resource Type.

Figure 434: ConSol CM Web Client - Opening a resource type page

Figure 435: ConSol CM Web Client - Resource type page
On the Resource Type page, all resources of this type are listed. They can be filtered by the values of the Resource Fields using the search in the top section of the page.
Like tickets, searches and customers, resources can also be placed in the Favorites section using drag-and-drop, e.g., on the resource page.

Figure 436: ConSol CM Web Client - Resource page: Using drag-and-drop to put a resource into the Favorites section
The same principle as for Resource Groups and Resource Types also applies to Resource Relations:
This is explained in detail in section CM.Resource Pool - Resource Relations. A short example:
To link a resource (e.g., a PC desktop) to tickets in the queue ServiceDesk, first, define this relation type (i.e., resource-ticket) in the Admin Tool.
Then an engineer can create a relation for a PC to a ticket, e.g., when an incident ticket involving this machine is created.

Figure 437: ConSol CM Admin Tool - Defining a new resource relation

Figure 438: ConSol CM Web Client - Ticket where a relation to a PC can be created

Figure 439: ConSol CM Web Client - Creating a relation between a ticket and a PC

Figure 440: ConSol CM Web Client - Ticket with relation to a PC
When the relation has been created, the counter of the relation is set to 1. The engineer can then display details of the relation by clicking on the relation name.

Figure 441: ConSol CM Web Client - Details of a related resource and context menu
The context menu of the related resource offers two options:
Resource Actions also have to be defined using the Admin Tool. Each Resource Action is based on an Admin Tool script.
Resource Actions are explained in detail in section CM.Resource Pool - Resource Actions. Here, only a short example is provided.
A Resource Action is always defined on the navigation item Actions in the navigation group Resources and the assigned to one or more Resource Type(s). For example, an action is defined which should offer the possibility to create a new ticket in the queue ServiceDesk, directly from the resource page. Thus, when a customer calls to complain about a problem with the PC, the Service Desk agent can start by opening the PC's detail page for information about this asset. If necessary, the agent can directly create a new Service Desk ticket for the customer.

Figure 442: ConSol CM Admin Tool - Definition of a resource action

Figure 443: ConSol CM Web Client - Resource activity (based on resource action)
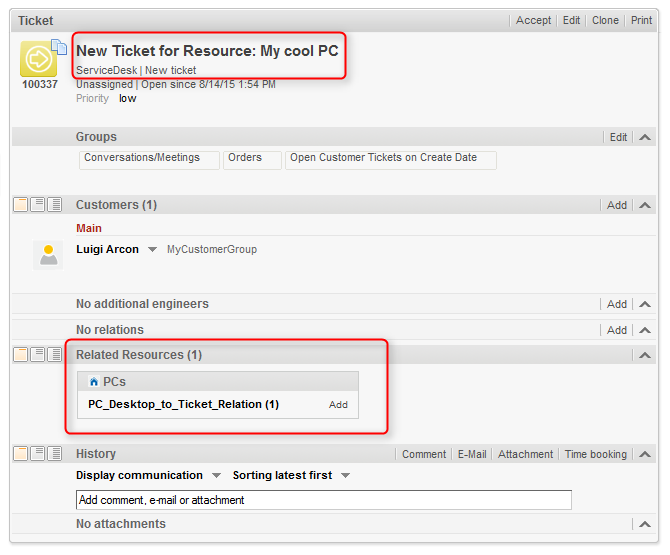
Figure 444: ConSol CM Web Client - Service Desk ticket created by a resource action
In the result list of the Quick Search, resources are displayed in a distinct section:

Figure 445: ConSol CM Web Client - Result list of Quick Search with distinct resource section
In the Detailed Search, an engineer can search for all resources of a certain type, provided that the respective Resource Field is indexed (the annotation field indexed has been set, usually to the value transitive).

Figure 446: ConSol CM Web Client - Detailed Search for resources

Figure 447: ConSol CM Web Client - Result list of a Detailed Search for resources
If search actions are defined for a certain resource type, the engineer will see the possible actions as Activities in the Web Client in each search result list where resources of this type are listed. Please refer to section Action Framework - Search Actions for details about this topic.