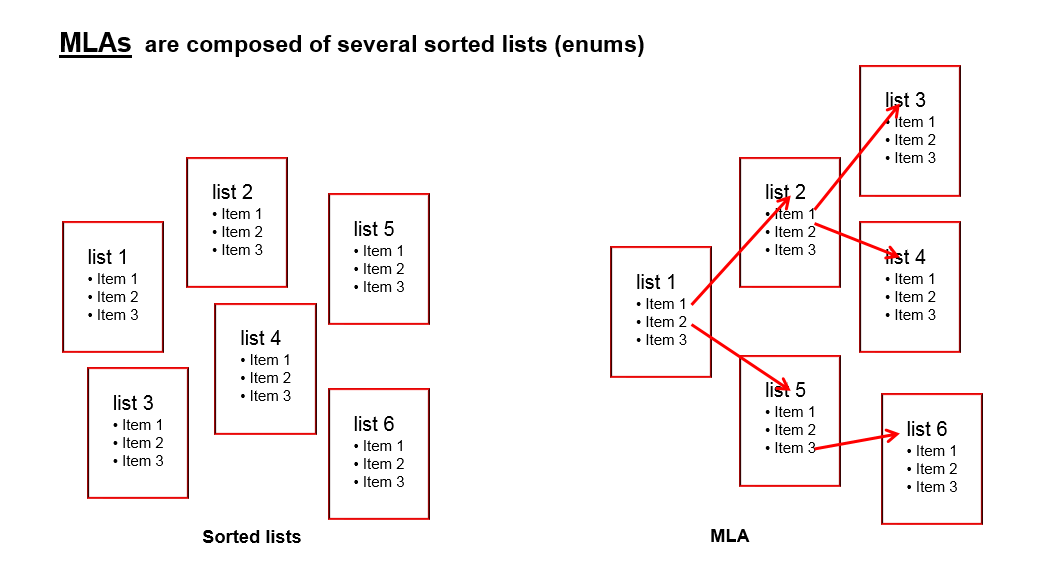
MLA is the abbreviation for Multi Level Attribute. An MLA is used to represent a hierarchical data set and consists of several lists which form a tree structure. Each item of a list can lead to a list of the next level with the item name being the name of the subordinate list. An MLA can be used for ticket data, customer data or resource data.
Figure 23: ConSol CM Admin Tool - MLA construction principle
Example:
For quality management you need to specify hardware or software products in a ticket. For this purpose you can create an MLA with the name QA_MLA. The next step will be to create the first level with the items Hardware and Software. For each item of a level you can create further levels, e.g. Graphics Card, Monitor, and Motherboard for item Hardware and so on. The picture below shows such an MLA in the Web Client.
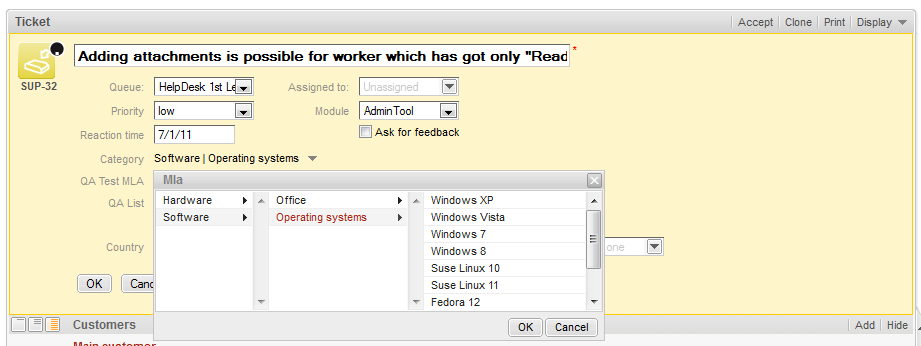
Figure 24: ConSol CM Web Client - MLA for hardware and software selection
The sorted lists (enums) for each level of an MLA ...
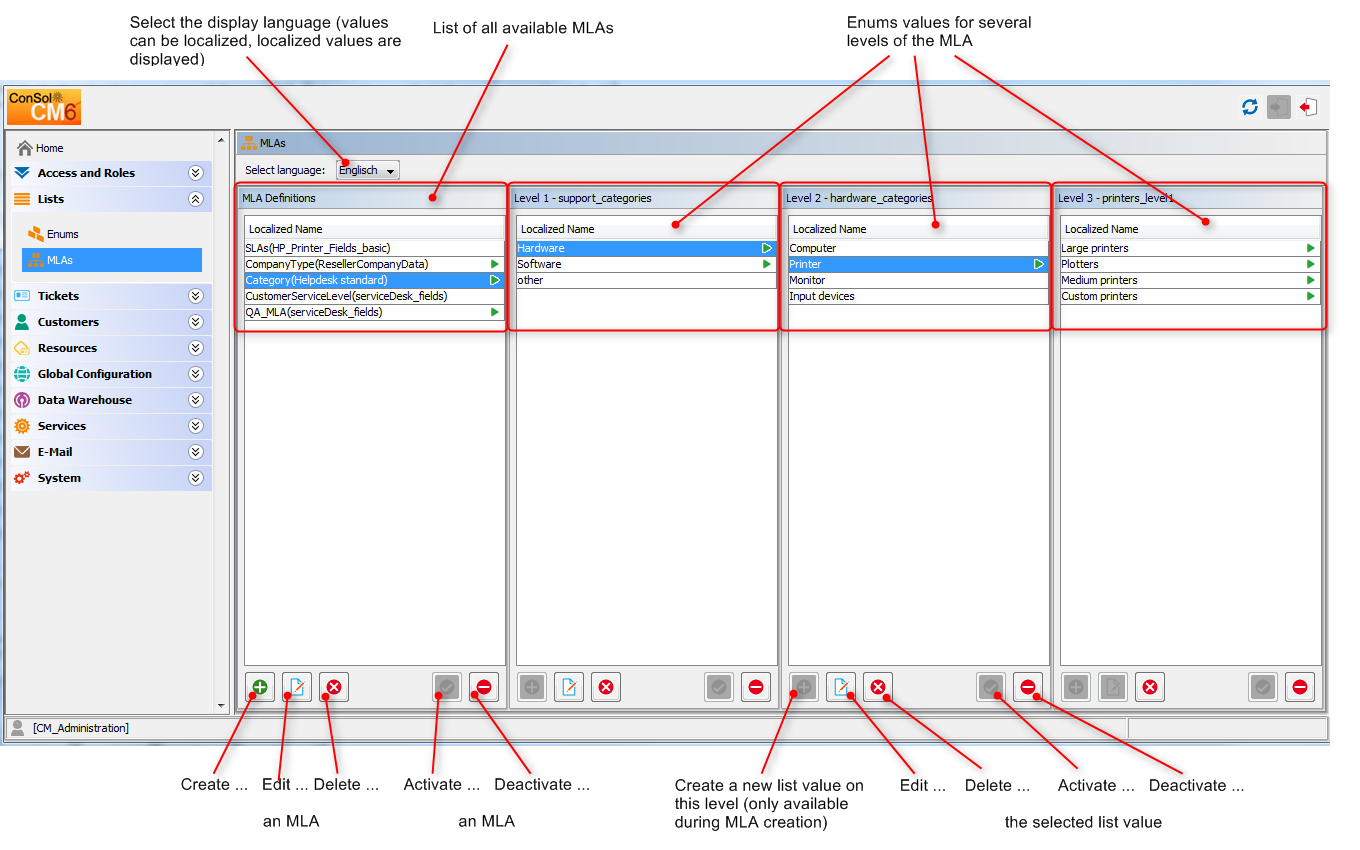
Figure 25: ConSol CM Admin Tool - MLA administration
All entries are shown with their localized names (i.e., how they are displayed on the Web Client) in the selected language. You can change the display language of this page by choosing a different locale in the Select language field above the list.
To create an MLA click the Add button below the MLA list in the bottom left corner of the page. The following pop-up window appears.
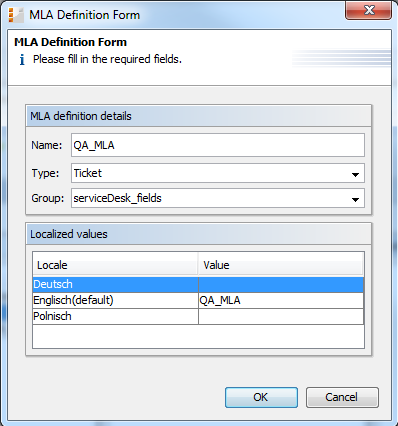
Figure 26: ConSol CM Admin Tool - MLA administration: Create an MLA
Click OK to save the details of the new MLA.
You can also create the Custom Field, Data Object Group Field, or Resource Field for the MLA first. In this case you will find the localized name of the Custom Field, Data Object Group Field, or Resource Field already in the list of available MLAs.
Having created a name and a Custom Field, Data Object Group Field, or Resource Field for the MLA you can go on with the definition of levels. Select the MLA in the list and click the Add button below Level 1. You will get the Enum level form where you can specify an enum for this level.
This menu is only available during the process of creating a new MLA, not when editing an existing MLA.
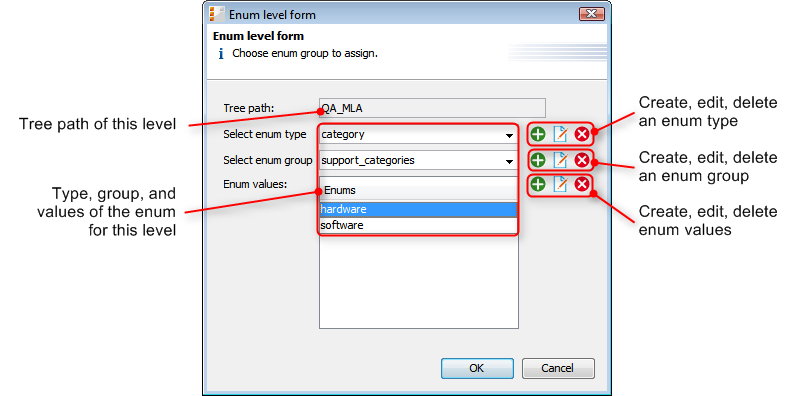
Figure 27: ConSol CM Admin Tool - MLA administration: Create an MLA level
Click OK to create the new MLA level and to close the window.
For each value of a level you can create further levels as previously described. Just select the value in the list and click the Add button below the next level area to the right.
If you have finished your MLA definition and see that you need an additional value for one of the levels, you have to create that value in the respective enum group within Managing Sorted Lists: Enum Administration.
If you want to edit a value of the level, select it in the list and click the Edit button. You can change the object name and the localized values but please consider that changes will affect other MLAs using the same enum.
A level can only be deleted if it is not used in a ticket. In order to delete it click the Delete button below the respective level. If you confirm the following dialog with Yes, the level and all its dependent levels will be removed from the list and the system.
If you cannot delete a level, or if you do not want to delete it because you might need it again, you can disable it. Just click the Deactivate button below the respective level. The level values (including the values of dependent levels) are shown in italics afterwards. Click the Activate button if you want to enable the level again.
If you want to edit an MLA, select it in the list and click the Edit button. The same window as described above for creating an MLA will appear. You can modify all fields except the Custom Field Group, Data Object Group, or Resource Field Group. Click OK to save your changes.
You can only delete an MLA if it has not been used. If it has been used, you get a warning stating you can only disable this MLA (see below). In order to delete an MLA select it in the list and click the Delete button. If you confirm the following dialog with Yes, the MLA (and the Custom Field within Custom Field Administration, Data Object Group Field within Customer Data Model, or Resource Field within Resource Model) will be removed from the list and the system.
If you cannot delete an MLA, or if you do not want to delete it because you might need it again, you can disable it. To do so select the MLA and click the Deactivate button. The entry in the list is shown in italics afterwards. A disabled MLA will not be displayed in the Web Client. Just click the Activate button below the MLA list if you want to enable the MLA again.