Communicating about cases
The Web Client provides the following communication features:
| Feature | For colleagues | For customers |
|---|---|---|
| Yes | Yes | |
| Comment | Yes | Yes (via CM/Track) |
| Notification | Yes | No |
| Mentioning | Yes | No |
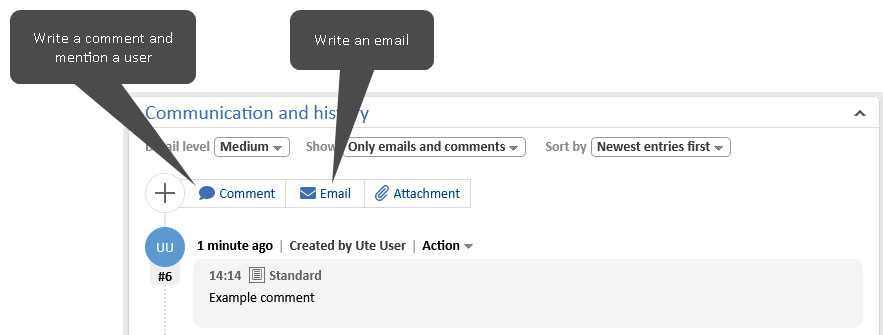
Emails, comments and mentioning are located at the bottom of the case, above the Communication and history section. Notifications are located in the menu bar at the top of the page.

Emails
Emails are used to communicate with customers or colleagues. They always concern a specific case. All emails sent from and received by the Web Client are displayed in the history of the case which they concern.
To write an email, click the Email button in the Communication and history section. Select the recipients and write the email in the rich text editor. You can use a template to prefill the editor with text drafted for a certain purpose. You can add attachments to the email if the case has any or quote comments and emails from the case history.
You can reply to and forward an email from the case history:
- To reply to an email, open the Action menu of the desired email and click Reply / Reply all. The sender of the original email is automatically selected as a recipient and the original email is quoted in the rich text editor.
- To forward an email, open the Action menu of the desired email and click Forward. The original email is quoted in the rich text editor, and you have to specify the recipient.
The status of the email is shown in the header of the respective history entry. If the email could not be delivered, you can click the Retry sending button to make another attempt at sending the email.
Comments and mentioning
Comments are used to document work on the case. All comments are registered in the case history, where you can see both your own comments, the comments added by other users, and the comments added by contacts via CM/Track.
To add a comment, click the Comment button in the Communication and history section. and write your comment using the rich text editor. You can use a template to prefill the editor with text drafted for a certain purpose.
You can mention other users in your comment by typing the @ symbol and entering the name of the user. The mentioned users receive a notification with a preview of the comment and a link to the case.
You can edit a comment which you added by clicking Edit in the Action menu of the comment. Editing is only allowed during a certain time after the comment was added. It is not possible to edit comments of other users. The different versions of the comment are saved and can be viewed in the case history by clicking the changed ago link.
Notifications
Notifications are short messages sent within the Web Client. You can view your notifications by clicking the bell icon in the menu bar.
Remove all notifications by clicking the Clear all button. Pinned notifications are not removed. Remove single notifications by clicking the X on the right side of the notification.
Notifications are used in several ways:
- The system sends a notification to users to inform them about a certain event. This kind of notification can include a link to a case, contact or resource.
- A user sends a notification to another user. You can send a notification by clicking the New notification button at the bottom of the notification window. Enter the recipients, select the type of notification and enter the notification text.
- A user mentions another user in a comment. The system sends a notification to inform the mentioned user. This kind of notification includes a preview of the comment and a link to the case to which the comment belongs.
In the user profile, you can decide if you want to receive emails if you miss notifications.
Using templates for emails and comments
Templates contain predefined text for a specific purpose, e.g. a signature, which can be used in the rich text editor for comments and emails.
To select a template while writing a comment or an email, click the Insert template content button. The available templates are displayed in a list. Hover over the template name to display the preview of the template, including a list of its attachments. You can select a template by clicking the template name in the list or by clicking the Insert template content button in the preview window.
The template text might include the following features:
- Variables (blue): Case or contact data which is automatically retrieved from the case.
- Parameters (red): Placeholders which you need to fill out above the editor.
- Text blocks (green): You can choose which text blocks to include by selecting the respective checkboxes above the editor.
The colors only serve the purpose of highlighting the features. They are not used in the created comment or email.